
For some of my designs, such as Rose Tendrils and Unbraiding Cables, I have created original stitch patterns to suit the design. There's nothing at all wrong with using an existing stitch pattern from a dictionary, but sometimes you want something specific that you can't find - such as the growing cable motif in Unbraiding Cables.
I don't take credit for 'inventing' any of these patterns - as Elizabeth Zimmerman has said, I'm only 'unventing' them. There's only so many ways to arrange increases and decreases, knits and purls, so someone has probably done the same or similar thing to what I'm doing before.
Don't Reinvent the Wheel
There's no need to start wholly from scratch when you can use an existing stitch as a jumping-off point. Flip through stitch dictionaries to find something similar to what you want, and modify it to suit.

In order to develop the main instep pattern on my Rose Tendrils socks, I took two different motifs from a Japanese stitch dictionary -- one of the leaves, and one of the 'buds' - and merged them together. The basis of my Unbraiding Cables came from a straight column of braided cables in a dictionary, which I then grew & shrank to fit on a hat.
Of course, if you can't find anything resembling what you want, you can try and create something from scratch. You can find an example of this process for lace in this Knitty article.
Chart and swatch, swatch, swatch!
I find it easiest to work out a rough chart before knitting; some may prefer to knit and write down your actions as you go. After I've found a pattern that will form the base of my stitch, I chart it out and make the necessary modifications, or if I don't have a pattern for a base, I rough out a chart that I think will work.
Charting software comes in very handy when you're developing a stitch pattern. Charts allow you to see the big picture of the design and make sure everything lines up. Software lets you easily cut and paste, reverse, or mirror blocks of stitches - much easier than working manually on graph paper.
I use Intwined; other software options include Knit Visualizer and Stitch Mastery.
Once you've roughed out a chart, the time comes to swatch. Knit out the pattern, make adjustments, and knit it again. It's a pain, but it's the only way to know that everything works out the way you want it to.
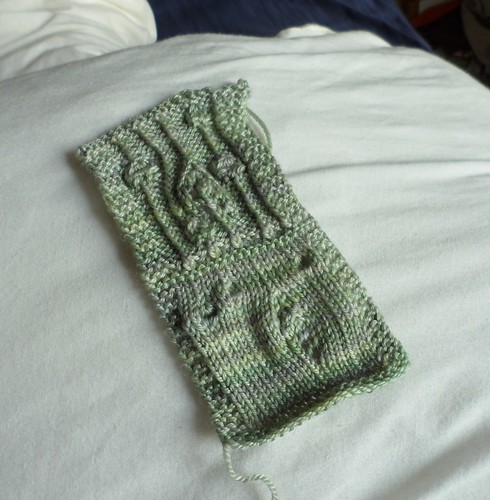
The more you swatch, and the more you knit in general, the more you'll get a feel for how different things can affect a stitch pattern - such as the clustering of decreases to form chevrons, or the way purl stitches can highlight motifs, giving them an embossed look. Here you can see the dramatic difference between two swatches, one with purls, and one without.
Fine-tune until it is just right
If things don't turn out right the first time, just try again. Motif too tall? Cut out some rows. Things not lining up? Adjust it so they do. Sometimes things that seem to work out on paper don't quite work in the yarn - that's what swatching is for.
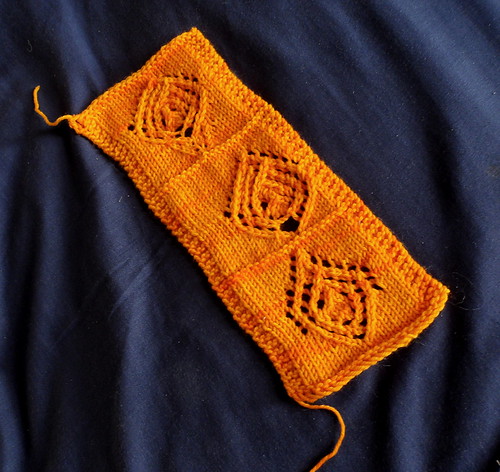
Here was my swatch for the lace clock motif on Rose Tendrils - I wanted a lace interpretation of a Mackintosh Rose. As you can see, on my first pass the lace came out too tall and angular. The second try was more satisfactory, but still not quite right. Just a few modifications and then I was left with the third try, which after a little more tweaking, is what made it on to the sides of my socks.
The majority of the process is really trial and error. You can mash together elements of existing stitch patterns or create a new one out of whole cloth. An original stitch pattern can add that extra bit of interest to a design to make it truly unique, and creating your own stitch pattern can let the vision of the pattern in your head translate perfectly into reality.
~Joyuna
 The Grateful Crane Shawl
 Elven Slippers
 Russell Square Mitts
 Russell Square Tam
 iTouch Jumper
 Twisty Wristband
 Mawata Pulsewarmers
what a helpful, fun article. Thanks
ReplyDelete