Showing posts with label techniques. Show all posts

The humbling experience of learning to knit all over again

Someone I know lost half of her index finger. She was an avid knitter and crocheter, and it's been hard for her to have her crafts taken away from her. This Christmas, I'm hoping to help her back into knitting. I ordered two sets of Tunisian Crochet hooks - the extra-long crochet hooks with space to hold extra stitches - and a yarn-tensioning pin.

The technique where the yarn is held in front, flicked with the thumb, and tensioned around the neck or a tensioning pin is commonly known as Portuguese Knitting, though it's used in many places around the world including Peru, Turkey, and Egypt too.

I can't say for sure yet whether this knitting style will be suitable for my friend - but since there are different movements and different muscles involved, it's worth a try.
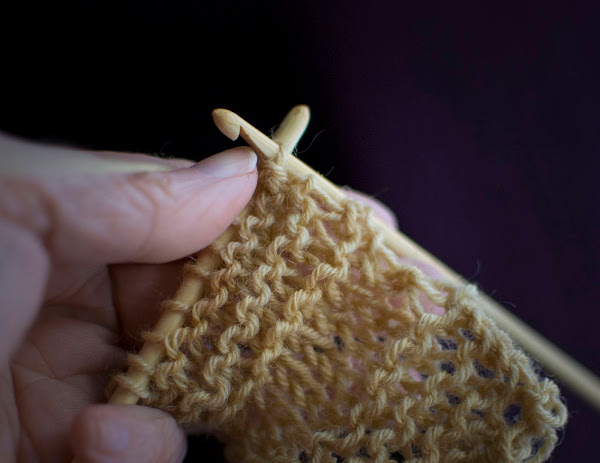
Before I can show her how to get started, of course, I have to be familiar with this style of knitting myself! I used these instructions by Andrea Wong from Piecework magazine. Andrea also has a wealth of videos, including more advanced stitches, on her Youtube channel.

My personal style of knitting is a little bit idiosyncratic - resting the righthand needle against my body, left hand moves the stitch, right middle finger flicks the yarn. I never learned the proper English 'throwing' style. But I've learned a few other techniques - Contintental knitting, two-handed colourwork, backwards knitting... so picking up a new style should be no big deal, right?

Yes and no! The first few rows were intensely humbling. Where do my fingers go? What do I do with the yarn?! For a moment I was transported back to making my very first garter stitch scarf. But after those first few rows I understood what I needed to do, and a few more rows after that I even got into a rhythm. Having some years of knitting under my belt helped - I could tell at a glance whether the stitch was correct after I'd made it - and my friend has many decades more experience than me, so she should be able to get into the swing of it too.

The hooked needles are a revelation, honestly. I felt like I didn't need as much fine control in my fingertips because the hook was doing the work for me. It's a very pleasant way to purl!

The left-hand hook did get in the way a little bit but I just had to keep it rotated so that the stitches would slide off and not get caught in the hook. (I needed hooks on both sides because I'm knitting flat -- but most of the hooked needles I've seen *meant for this style* are DPNs with the hook on one side, so you're knitting off a smooth needle, and onto a hook. In the round = no turning, no need for a hooked left needle!)

The hooks are not necessary for this type of knitting, but I found it a great help, and I think they would be especially good for anyone with motor issues, RSI, or other issues with their hands.

I'm pleased to have had a short introduction to a new technique, and I look forward to showing it to my friend. Hopefully it will work for her and this will let her start creating again!

~Joyuna

The one-ball sweater | Combospin and embracing chaos

I've been working on a really interesting project for the past several months - a Combospin. I'm a little late to the boat on this method, but I was so excited when I found out about it, and saw the amazing results of other people on Ravelry.

handspun yarn combospin knitted swatch of orange, yellow, red and other colours of wool and other fibres
Combospinning is a way to combine individual braids of hand-dyed fibre into a cohesive yarn for a larger project. If you have a habit of stashing 100g here and there that you never know what to do with, this is an ideal way to turn them into a sweater-quantity of yarn.

The process is very simple: Take all your fibre (in braids, in batts, or any other put-up) and break them up into smaller pieces. Mix them up in a big bag or box, and just spin one piece after another.
So I shopped my stash, and I filled in the gaps with some extra purchases, and found 750g of fibre along the yellow-orange spectrum. It wasn't an exact process, and in fact, having a few braids that don't quite 'fit' added more interest to the project.
Combo spin hand dyed fibre braids in oranges and reds
This is spinning by embracing chaos. You do not plan out a sequence of stripes, you do not (need to) match up colours or fibres or even drafting styles - you can combine combed top and carded batts, and no one will arrest you. The spinning police aren't coming for you.

The resulting yarn is perfectly "conspicuously handspun". The plies blend together in some parts, toning each other down, while at other spots a stripe of bright colour will pop out when the plies align. It's a similar effect to fractal spinning, on a large scale and more random. Embrace the barber-pole.

This is a sort of polar opposite project to my just-finished handspun sweater. In that project, I was focused on consistency: all the same fibre, all the same spinning technique, all the same thickness. I was, more or less, trying to imitate a factory-produced millspun yarn. In this combospin, I am letting go of consistency and order, and creating something that you couldn't ever buy in a shop.

I spun them up, and the spinning process was addictive - just one more length of fibre, just one more bobbin...

bobbins

Each one of my three plies nicely filled up my set of 5 bobbins - very satisfying. When I mixed up the bobbins and wound them off, I decided to wind each ply into one continuous ball. Why? Just to keep things organised, really.
Winding a plying ball of singles for handspun yarn combospin project
And when I finished each ply, I thought I might as well wind them all into one big plying ball...

Why? There isn't a good reason. I just felt like being extra. I wanted to see what it would look like. It was glorious!
Giant yarn ball of 700g of handspun singles
Yes, that's nearly 750g of yarn in one ball as big as my head.

Of course, I had to break the yarn into separate skeins when it came to plying. And just like the spinning, the plying process went by very quickly because it was so gratifying to see the colours combine in such interesting ways.
And then I had this yarn: yellow and orange, but also flecked with lengths of red, and brown, and green and even purple. Crunchy downs wool and silky rayon and buttery-soft merino. A fabulous buffet of colours and textures. View my stash details on Rav.

This is my third handspun sweater project. I've enjoyed them all, but I've definitely had the most fun with this one.

I've already cast on. Now, I just have to keep on knitting!

~Joyuna
Combs!

Finally, finally, I got my combs. It felt like a big purchase (though when you think about it, it's the same as just a few big orders of yarn or fiber), but I really wanted them so I saved up and they're here!

They're Valkyrie Extra Fine Minis, from The Whorl's End. When I opened the box, I was delighted to see that it was padded with wool :) Donna keeps some mule (BFL cross) sheep, and this fleece is long and shiny, so that's probably what it is. It makes perfect combing practice!

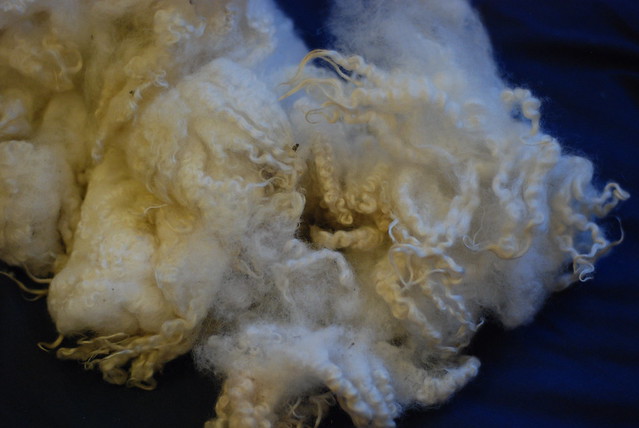
Longwool BFL x fleece locks
What to do with the fleece? There's a fair amount of it, certainly enough for a little project. It's pretty soft and shiny. The fleece is aesthetically lovely, with those long curls and that pearly sheen. I think it will make lovely, lustrous lace.

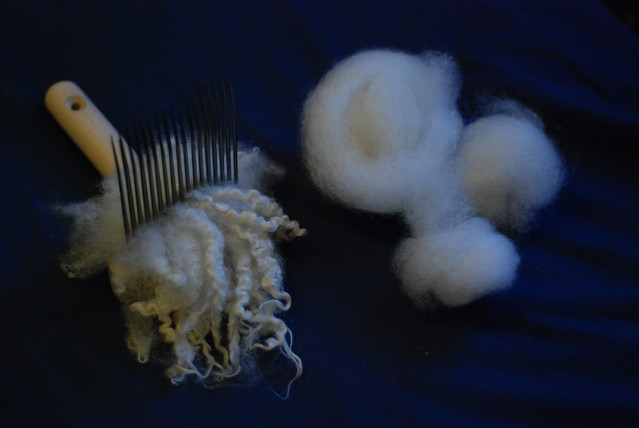
Valkyrie Extrafine Mini combs combing longwool fleece
The little nests are coming off my combs as fast as I can produce them. It's a little addictive, turning locks into perfect-looking top. It's definitely more productive and a better result than my previous ersatz method.

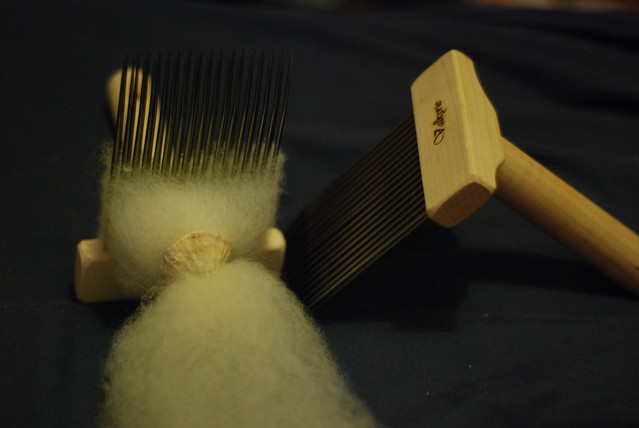
I'm dizzing off the combs with a seashell I found on the beach in Devon - which already had a hole in the center. The broken edges of the shell were smoothed down by the sea. The diz is so easy to use with these super-long locks!
Dizzing combed BFL cross fleece off of Valkyrie combs with a seashell
The diz hole is about 1.5cm or 1/2 inch in diameter, which makes for quite thick top (the fiber fluffs out a LOT after you pull it through that little hole!). In the future I'll look for a smaller hole - but, the rounded shape is just perfect for funneling the fiber through.

I've tried combing some of my fleece stash, and everything has turned out great. It was tough deciding which combs to get - Valkyrie offer Fine, Extrafine, Superfine, and Viking combs (larger combs for medium to coarse fibers). I like to work with a variety of fibers but favor the finer side, and I think the Extrafines were a good choice for me.

Combed silvery grey Gotland fleece in dizzed nests
This is some Gotland I've been stashing away - previously I've been spinning it from the lock, which has turned out well, but the fleece has some color variations. When each lock was a slightly different shade from the next, it would spin up into a sort of subtle striping. For the project I have planned I wanted a more consistent look - it was easy to blend the lighter and darker fibers together on the combs.

~Joyuna

TECHKnitter, my knitting hero

A minor bout of insomnia last night compelled me to do an archive binge of the TECHknitting blog. TECHknitting is one of the blogs I return to time and time again - if you haven't visited before, it's well worth a browse. And if you have, it's well worth another look!

Each post has something useful inside - many practical quick tips such as what to do when your stockinette is uneven, tightening up the backwards loop cast-on, ways of adding elastic to socks and how to do "stranding" only working one color at a time.

Some posts are more theoretical, exploring what knitted fabric is or why stockinette curls.

Many tricks I've picked up from TECHknitting I've put into my knitting repertoire - such as increasing my efficiency of movement, stopping the old color showing through when changing colors in ribbing, and short-row shoulder shaping. And I've learned some new things just now, too - like the proper way to perform that pesky continental purl stitch and the fact that center-pull balls affect twist (the question is, how much? and is it enough to affect the yarn? Hm, this calls for an experiment...)

~Joyuna

Experiments with Combing

I need some wool combs.
I tried combing for the first time at the workshop in Ringwood, and I really liked the result. I've often had trouble spinning evenly from rolags - the results can be OK, but I end up with lumpy yarn. My preferred method of fleece prep up until now has been flicking and spinning from the lock, which works really well unless your fleece has variations (in length, or texture, or color) - then one length of yarn can be very different from the next one.

In the grand scheme of things, a set of combs is not that expensive, especially when I can tell I would get good use out of them. Still, a quality pair of combs is an investment and would wipe out my fiber budget for the month, so I need to save up before I plunge in.

Still, I'm not very patient. And some Romney fleece arrived at my doorstep - long, lustrous, and quite crimpy too. So I decided to experiment with what I had around the house and make some ersatz combs.

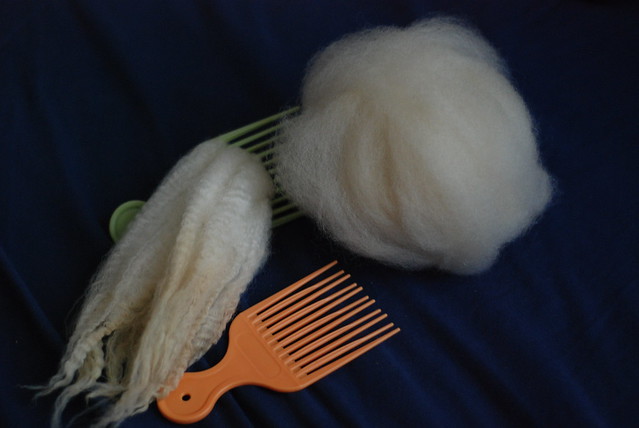
Combing Romney wool fleece with plastic hair picks/afro combs

Two plastic hair picks, the kind you can get for cheap at your local drug store. They're not sharp, not sturdy, and not particularly ergonomic. They don't hold much fiber. But, they'll do for an experiment. And as you can see, they worked! I managed to produce a ball of fluffy, smooth, spinnable top from my Romney locks. Hair picks are to wool combs as dog slicker brushes are to hand cards - not the best way to do things (they don't hold much, not very durable, not designed for the job) - but a way to experiment and try it out without a big investment.

Fuelled with excitement, I did a few more samples. OK, actually a lot more samples...
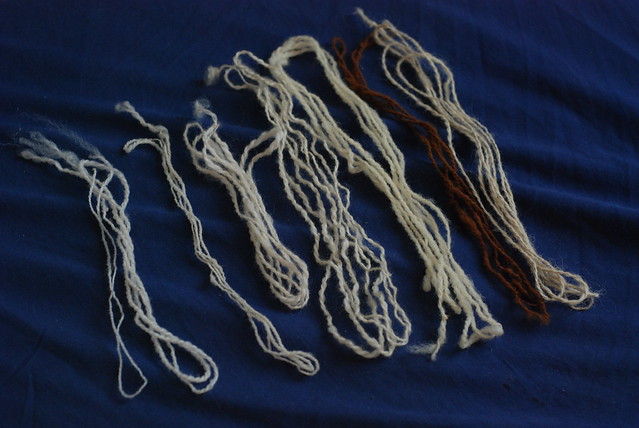
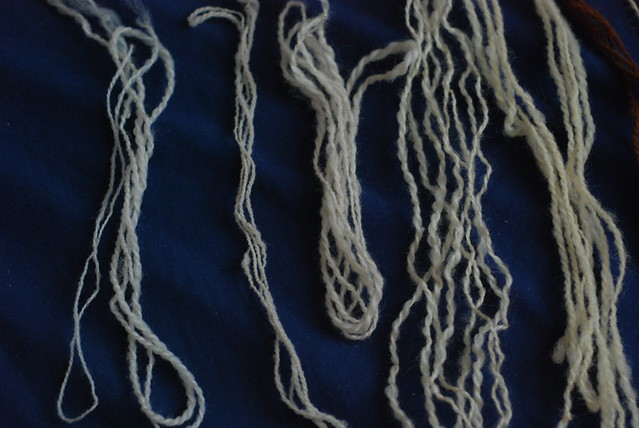
Alpaca and wool yarn samples combed prep from fleece
(Right to left: Suri alpaca, huacaya alpaca, Oxford Down, Wensleydale, Aland, Bowmont, and Romney spun both thick and fine)

Yep, I loved the results. The smooth texture, the sheen, the evenness I was able to achieve, the way I can comb bit after bit and roll them into one big ball of top, rather than flicking out each lock separately.
Handspinning fleece samples worsted prep combed top Longwool and finewool and down wool

I'll be able to be much more productive once I get my proper combs - but these experiments have been really fun and enlightening too.

~Joyuna
Levels of Knowledge

The great thing about the world is that there is so much information to absorb - far more than any one person can ever learn. Which means that when we learn or develop a skill, we're progressing up a ladder with an infinite number of rungs. And no matter where we are on that ladder, some people are above us, and some below.

There have been some discussions I've read lately that have gotten me thinking about this. And I think it's a useful idea to keep in mind.

When I was studying for my MA, I would get two very different reactions: Some folks would look at me in a kind of awe -- "A Master's Degree? Oh, wow." Others would ask me, "So, when are you getting your PhD?"
It's all relative. In the eyes of the first group, I was studying something very advanced. To the latter, it was just another stepping stone towards something even higher.

It's like when I knit a sock on double-pointed needles, and some people look at me like I'm performing black magic. Even when I know it's quite simple once you're used to it, and there are so many other more advanced things you can do with knitting, some well beyond my own expertise.

Similarly, I could never consider myself a 'spinning expert' - after all, I've only been doing it for a few years. But I can usually make the kind of yarn I want to make, and I've got the basics down pretty well. I have taught other people the basics to spinning on a drop-spindle, and they have gone on to develop their own spinning skills.

I believe there is a place for intermediate learners teaching beginners, because this ladder of knowledge is so vastly high. And when you have learned something new, you can get really enthusiastic and share that knowledge with other people - even when you do so imperfectly.

But similarly, when someone higher up on the ladder explains to an intermediate learner that what they are teaching is a little awkward, or poorly phrased, or downright wrong, the learner needs to take that gracefully. Not necessarily without argument - not all information is set in stone, and many times there is no One Best Technique. But the advice should be taken and considered in the spirit that it was given, and the learner should not feel hurt or bullied.

I know I've been guilty of teaching as a non-expert - maybe making some flubs along the way. I've always written to the best of my knowledge, but when the pool of knowledge is so vast, of course I can't take it all in. So this is my request: If you read something here and you don't think it's true, by all means leave a comment! You're doing a favor for me, and for anyone else who reads that post in the future. Maybe it's a factual error, or maybe it's a difference of opinion, and either way we'll all learn something.

~Joyuna

Horror of Horrors... M*ths

Last week I was pulling some of my sweaters out of storage, because it is getting into full-on sweater weather. I was trying one on, not a care in the world, when my partner's mother pointed out a hole.

A hole...?!

Surely it must have gotten caught in the zipper of the suitcase. Not a problem, I can mend it, it's fine. I went home, taking the case with me. But when I took out the other items, I found more holes, and they were bordered in these curious sandy gray deposits...

Moth droppings.

All in all, four articles had gotten nibbled, plus three big bags of fleece. Everything with evidence of moths went into the freezer for 3 days, then out to thaw, then back into the freezer again. The first freeze kills all the larvae and adults, the thaw allows any remaining eggs to hatch, and the second freeze kills whatever has hatched.

The fleeces got inspected, with any particularly nasty bits thrown out, and then washed. These were all unwashed fleeces - moths love dirt and sweat. I've learned my lesson.

Dupicate stitch swiss darned knitted items sweater hat
Finally, I was left with my four items in need of mending: two sweaters, a hat, and the border of a shawl. I was lucky enough to find some leftovers from three of these projects, so my yarns are a perfect match: now, to the mending.

Thin Down Thick Singles Yarns for Sewing Up

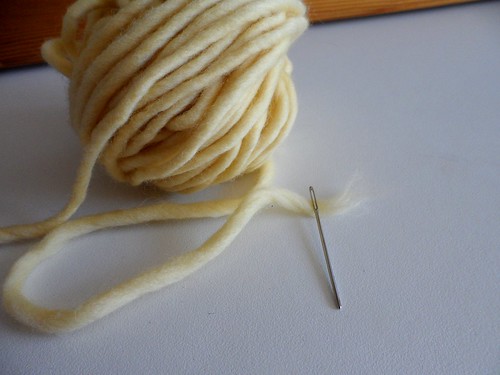
Bulky yarns have their advantages, and disadvantages. They knit up quick, but bulky yarn can be fiddly to work with. My Modern Garden Cardigan was knit in Debbie Bliss Como, a super-bulky wool/cashmere blend with a scant 46 yards per 50g. This is thick, lovely stuff. So thick, I had trouble fitting it through darning needles... or the holes on my buttons.

Thick super bulky chunky yarn through a yarn needle solution


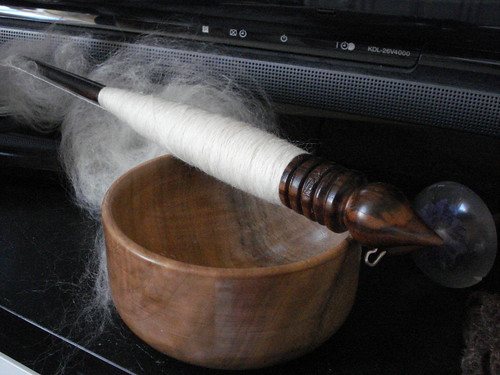
There are a number of solutions to this dilemma. If this yarn were made up of multiple plies, I could separate one of those plies to use as thread - but this is a singles yarn. I could find some thread in a similar shade to sew on my buttons. Or, I could find a different yarn in a matching (or contrasting!) shade. In fact, using a different color to sew on buttons can add an interesting pop to a project. But, that wasn't what I was after in this case, and my spindle was just nearby...

Perfectly Placed Buttons on One-piece Cardigans, Every Time!

When I was knitting my Modern Garden Cardi, I came up with a nice little trick to ensure my buttons were perfectly spaced to match the buttonholes. I'm sure I'm not the first person to think of this, but I hope it comes in handy for you!

Note, of course, this trick only works for placing buttons on cardigans knit in one piece. If you're knitting the left and right sides of the cardi separately, or if the buttonband is knit at a different time than the rest of the cardi, this won't really work. But for top-down or bottom-up cardigans knit in one piece, it's a handy little trick.

It's absolutely simple: on the row you work your buttonhole, mark the opposite side with a purl stitch. Take a look:

Placing buttons on a knitted cardigan tips and tricks

Can you see the purl? It blends in with the garter stitch on this button band, so it may be a bit hard to see. But it's plain as day on the wrong side:
Garter stitch buttonband seamless cardi button spacing trick


To spell it out a bit clearer, a typical buttonhole row on my Garden Cardi looked like this:
k2, yo, ssk, k to last 3 sts, p1, k2.
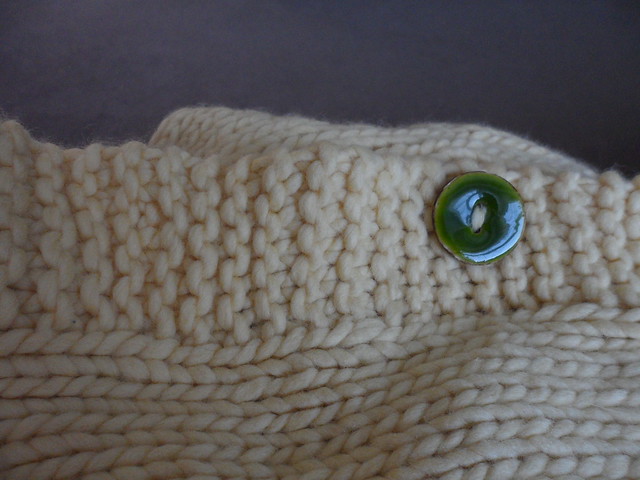
Since the purl stitch is on the exact same row as my button hole, it perfectly lines up. And since you're sewing a button on top of it, no one will be the wiser! And if your buttonholes are evenly spaced by number of rows, you'll know for sure that the buttons are evenly spaced, too. It saved me a lot of trouble when sewing the buttons on my cardigan.
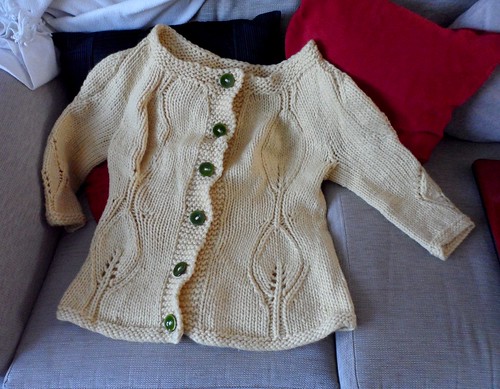
One piece seamless cardigan bulky wool yellow green buttons

I hope you give it a try next time you're making a cardigan in one piece! Never worry about spacing your buttons properly again.

~Joyuna

Making do and Mending

There was a time when materials were costly, and time was plentiful. To get a pair of socks, you would need to get the wool off the sheep, prepare the wool, spin it into yarn, take that yarn and knit it... you get the idea. Nowadays, if you want a pair of socks, you can hop down to the shop to get any flavor of sock yarn. Or, you can just buy the socks themselves.

But when your materials are scarce, you want to conserve them in any way you can. That means unravelling and re-knitting sweaters as children grow older, or darning socks. Recently I had a mishap when my darning pile got mixed in with the laundry pile - my pair of merino cashmere socks were already wearing thin, and while they didn't felt in the wash, the thin spots got even thinner to the point where I just couldn't darn them any longer.

Old worn out handknit darned socks frogging recycled yarn

Instead, I'll make them into something new.

Navajo Knitting for Hexipuffs

I heard about an intriguing technique while I was at the Glasgow School of Yarn - 'Navajo Knitting'. No, it's not a traditional Native American knitting technique - it takes its name from Navajo plying, or chain plying, in spinning. I've done Navajo plying many times before - it's an extremely useful technique to preserve color changes in handspun yarn, and to make a 3-ply out of one strand of singles. In a nutshell, you make a very long crochet chain out of your singles, and then twist that into yarn.

Navajo knitting is the same principle, only without the plying twist. You take your single strand of yarn, and start making it into a long (as long as you like - an arm's length of more) loop, and pull the yarn through the loop, as if it were a giant crochet chain. It takes some getting used to, but it's very effective once you've got it. The technique was first 'discovered' or 'unvented' by Lucy Neatby, and you can see her video on it here.

Why use Navajo knitting? It's the perfect way to knit with a yarn tripled. It's easy to knit yarn doubled - just knit from both ends of a center-pull ball. But to knit with yarn triple, you'd need either three balls of yarn, or a center-pull plus an extra ball. With this technique, you can easily knit with three strands of yarn out of only one ball.

I tried it out on some laceweight swiss silk I got from The Yarn Yard booth as GSoY, for my hexipuff blanket. It worked a treat!

Tiny Owl Knits hexipuff hexagon lace silk navajo chain ply knitting triple stranded Yarn Yard Morningside

See the loop at the end of the yarn? The silk is far too thin to be knit on its own into puffs, and it's a bit thin even when doubled. But tripled, it's just the right weight.

~Joyuna

First stabs at colorwork

I've been practicing my colorwork recently. The reason is I was inspired at the Glasgow School of Yarn to knit Ann Kingstone's amazing Pemberley jumper. However, the only stranded colorwork I've done so far has been very basic, and a very long time ago. So, in preparation for this knitting marathon, I have been in training - working a few more basic colorwork projects before tackling the big leagues.

First, I dug a project out of my queue that I've been planning for quite some time. I wanted to knit a jumper that had some colorwork, but not too much. I wanted to knit a jumper out of handspun, but I didn't want to spin a whole sweater. Enter my Caitlin pullover. It's a simple free pattern for a pullover with colorwork on the sleeves, bottom edge, and yoke. I spun up four natural colors of Shetland top as well as some orange top for the colorwork sections, and I had some Lang Shetland Soft yarn (also in orange) to use in the plain sections. I can have my cake and eat it too - work a handspun colorwork sweater, but not have to spin it all or knit it all in colorwork!

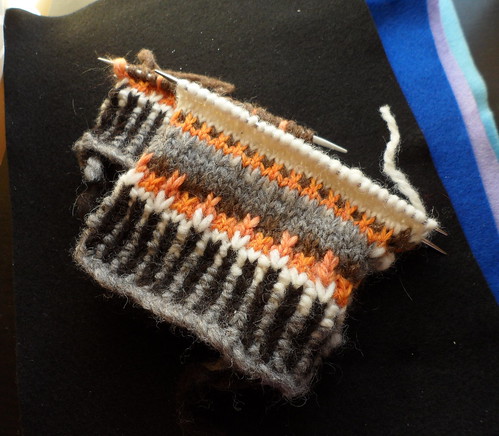
Cascade Caitlin Pullover slip stitch colorwork natrual undyed black white grey brown moorit orange handspun Shetland wool yarn

The colorwork pattern is also deceptively simple - most of the colorwork is done through slipped stitches, not stranding. In fact, there are only a handful of rows in the chart which use stranded colorwork instead of slipping stitches. The end result is much easier to knit than it appears.

Next, to further practice my stranding/Fair Isle colorwork, I'm making Ella Austin's Intrepid Fox. This is an absolutely adorable toy that uses some simple fair isle patterns on the body and legs. The stranding pattern on the body is optional, but I think it adds a very nice touch! Though, to be honest, pink hearts on a gray background reminds me of Companion Cubes more than anything else :)
Bombella Intrepid Fox Skein Queen stranded colourwork Fairisle pink and gray hearts

I plan on working a few more small fair isle projects (such as the Endpaper mitts, maybe) before tackling Pemberley. I am really, truly awed by that design but also a little intimidated by it. But, I'm confident that if I take it step by step, I can conquer it!

~Joyuna

Spinning froghair on a Russian spindle

I just recently got a secondhand Russian spindle. Russians are support spindles, not drop spindles - instead of hanging suspended in the air, their pointed tip spins in a bowl, like a top. Support spindles are great for spinning ultra-short fibers or ultra-fine yarns, because they can spin very fast and there's nothing weighing the yarn down. As a drop spindle spins and accumulates a cop, the spindle becomes heavier. A supported spindle effectively weighs nothing, or very little, because it's not hanging in the air.

Spinning cobweb yarn on a Russian style supported spindle

You don't have to be the world's best spinner to spin very fine lace yarn on a Russian spindle. The singles that I'm currently spinning measure over 80 wraps per inch, and my plied sample was 36 wpi. Here are some tips.

My love-hate relationship with cables

I have a confession to make: I don't enjoy cables.

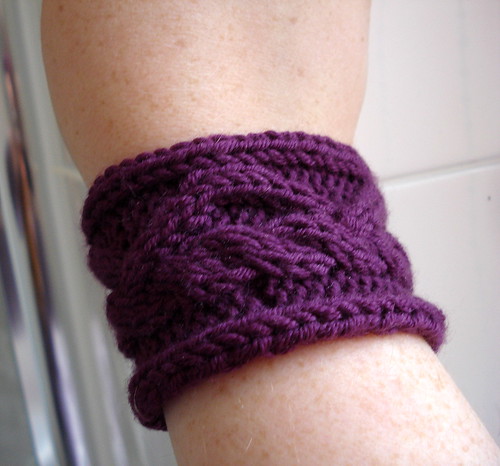
I keep designing things with cables, I keep knitting them, I keep adding them to my queue... but I honestly do not really enjoy knitting them. I don't like fiddling with a cable needle, I don't like having to remember which way the twists go, when I tried cabling without a cable needle, I didn't like letting the stitches drop off the needle. I don't like reordering stitches and I don't like how cables make it hard to count rows. I'm a tight knitter, and cables are darn fiddly. Working a cable also interrupts the flow of knitting.

Cable knitting cableknit wristband techniques

Closed loop cables

To work some particularly awesome cable designs (like this one for instance), you need to learn a technique known as closed loop cabling.

This isn't something I've heard of til recently (I haven't done many complex cable patterns), but it makes sense if you think about it: the basic cable resembles a rope or braid, which can go up or to the side, but not merge with another strand. Closed loop cabling allows your strands to meet.

Closed Loop Cabling cable knitting techniques tutorial


In order to do this from the bottom (making a cable that starts from a U shape), you have to increase multiple stitches at the point where the strands meet. Likewise to do so at the top, you need to decrease.

There are a number of techniques to do these increases or decreases, which involve a number of stitches. Here are a few tutorials I've found:

Ariadne Knits: Mirrored double increase
Ariadne Knits: Slipped decrease

Another tutorial on the Alice Starmore increase

Our Curious Home: Christmas tree increases
Our Curious Home: Cable Capping decrease

~Joyuna

Supported knitting & knitting sheaths

I'm a self-taught knitter, and people often remark on the way that I knit. In terms of in which hand I hold the yarn, I am an English knitter or 'thrower', but I hold my needles a bit differently. I 'anchor' my needles against my body - against my thigh for long straights, and against my belly or chest for circs & DPNs.

It wasn't until some time later that I learned my knitting style has a name - supported knitting, which covers several styles of anchoring - against your belly, waist, thigh, in your armpit (sometimes called 'pit knitting'), or knitting using a knitting belt or sheath.
Learning to knit beginning support knitter thrower English style straights

Understanding Kitchener Stitch

There are some people who shudder at the mention of grafting. Not too long ago, I was one of you, dear friends. But, between a couple top-down socks and a tubular bindoff or two, a lightbulb came on. Something clicked. And now I know it, and I understand it, and I even appreciate Kitchener stitch.

It used to be that every time I wanted to graft an armpit, sew up a toe, or any of the other numerous uses for kitchener stitch, I had to look up the step-by-step instructions on the web and follow them slavishly. It was painful. I was already uncomfortable, having the sewing needle in my hand, having cut my yarn, worrying whether I cut it long enough, just wanting to have my darn socks done already...

Let it go. Leave all that anxiety behind. The trick is simple: you just have to understand it. Once you understand, you will never need to look up instructions again.

Top-down cuff-down knitted handknit socks on DPNs kitchener grafting sewn

Spinning socks on the fly

Spinners: Are you impatient, or possessing a short attention span? Do you tire of long stretches of spinning, eager to see how your yarn will knit up? Do you have a small spindle or bobbin, which holds hardly any yarn?

If you answered yes to any of these questions, then this "socks on the fly" technique is worth a try.

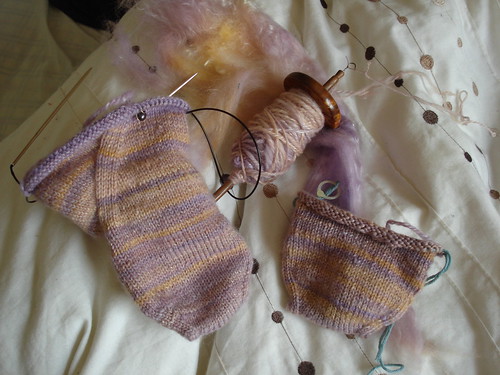
Socks on the fly navajo chain ply on the fly drop spindle two-at-a-time magic loop socks handspun technique

First, prepare your fiber. If you want your socks to match, split the braid in half lengthwise and predraft, or at least give the fiber a little fluff. Separate your fiber into pile A and pile B.

Begin spinning from pile A, using the Navajo ply on the fly technique. This is a fantastic method, and I wouldn't navajo ply any other way! Once your spindle is full, you will have a cop full of 3-ply chain-plied yarn. Wind it off the spindle into a ball, and begin knitting Sock A.

Sock A is on the needles, now start spinning from fiber pile B, chain ply on the fly, wind off, cast on Sock B. Lather, rinse, repeat until you have a new pair of handspun socks.

I started doing this because I am an impatient spinner, who takes ages to spin enough yarn for a pair of socks, always wants to see how my yarn knits up, and my spindle is tiny. When I was spinning for my Gail, I had to wind off the spindle 4 times, for only 2 ounces of fiber! So, if I was spinning it all first and then knitting it, I would have to keep joining the skeins anyway.

I'm loving this project. I get to knit and spin at the same time, I get both socks at the same time, and my stripes match (mostly). You could even adapt this method to knitting the socks 2AAT magic loop, but I don't like 2AAT, so I just put each sock on hold when it comes time to knit on the other sock. If you have two sets of needles, it's even easier.

~Joyuna

The beauty of the knitted mobius (moebius)

I don't know if it's been the same where you are this winter, but here, circle scarves or infinity scarves have been a HUGE trend. It seems like practically everyone's wearing them. They're practical too - it's a scarf that won't fall off, like an oversized cowl. It drapes well and there's no knot sitting uncomfortably around your neck.
My latest knitting obsession takes on the circle scarf, with a twist (actually, a half-twist).

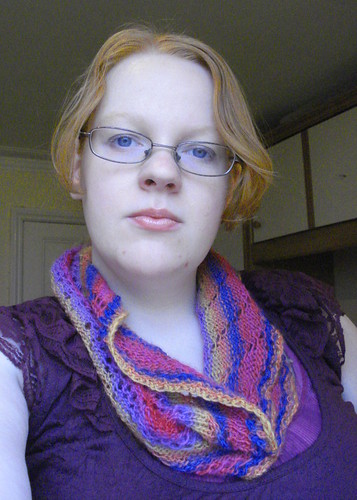
knitted moebius cowl rainbow infinity scarf knitting cat bordhi
My moebius cowl on Rav

Have you ever heard of a Möbius strip? It's a band with a half-twist, and when you run your finger around it, you find that the two sides are actually one. The inside is the outside; the outside is the inside.
MC Escher ducks flying mobius moebius strip tessellation
(MC Escher)

How does this work in knitting, you wonder, since knitted fabric has a very obvious right and wrong side? It's very interesting, actually...
Using the moebius technique perfected by Cat Bordhi, a variation on the provisional caston without waste yarn, you knit the mobius from the middle outwards. The result is one edge is in stockinette, and the other edge is in reverse stockinette, with the divide along the equator of the strip.
Cat Bordhi seamless knitted lace mobius moebius scarf cowl shawl

Here's Cat Bordhi's video tutorial for casting on a moebius. She also has two whole books of moebius patterns, A Treasury of Magical Knitting and A Second Treasury of Magical Knitting.
Here's some written instructions and here's another set. The cast-on is the hardest part of the mobius; the rest is all knitting.

There are several methods for knitting "fauxbius" scarves as well, such as casting on with a twist, or using a provisional CO flat and grafting the edges together at the end. The former does not produce a mobius, because it creates a full-twist instead of a half-twist; the latter does not create the fascinating fabric that a center-out mobius does. (plus, knitting flat? yuck ;)

I can see all sorts of exciting design possibilities with reversible stitch patterns and the mobius. I've already knit two, with plans for more!

~Joyuna

Resources for tubular bindoff in 2x2 rib

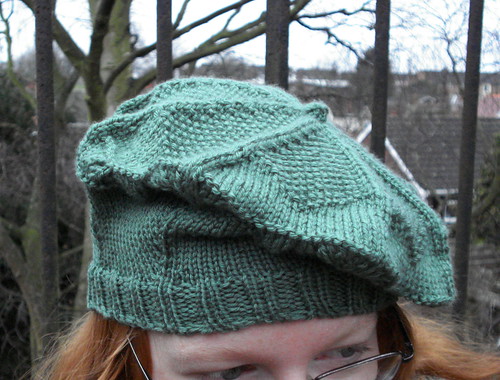
I'm working on a companion pattern to my Russell Square mitts, a tam/beret. It ends in 2x2 rib, so I decided to use a tubular castoff to give it a clean, elastic edge. When I began searching, I found that most tubular bindoffs are intended for a 1x1 rib, but a 2x2 variation does exist.

Russell Square London tube tam beret knitting pattern hat

The first way to do it is to convert your 2x2 ribbing into 1x1, and work a tubular BO as normal. That technique is covered here.

The second is a true 2x2 tubular ribbing bind off. I first found it on pages 22-23 of Knitting Tips & Trade Secrets by Mary Galpin Barnes, and you can find it in the Google Books preview for the book, with pictures. This is probably the best way to learn it if you're a visual learner, like I am.

There's also this post on craftster which describes the same technique very well in text, except I think she may have forgotten the step of drawing the yarn through purlwise on the second purl stitch.

~Joyuna